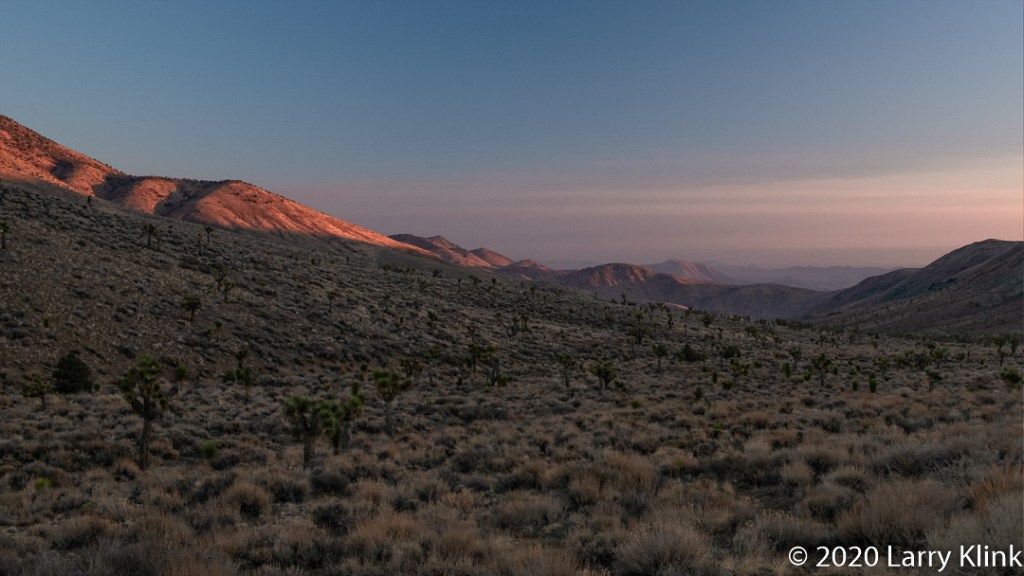
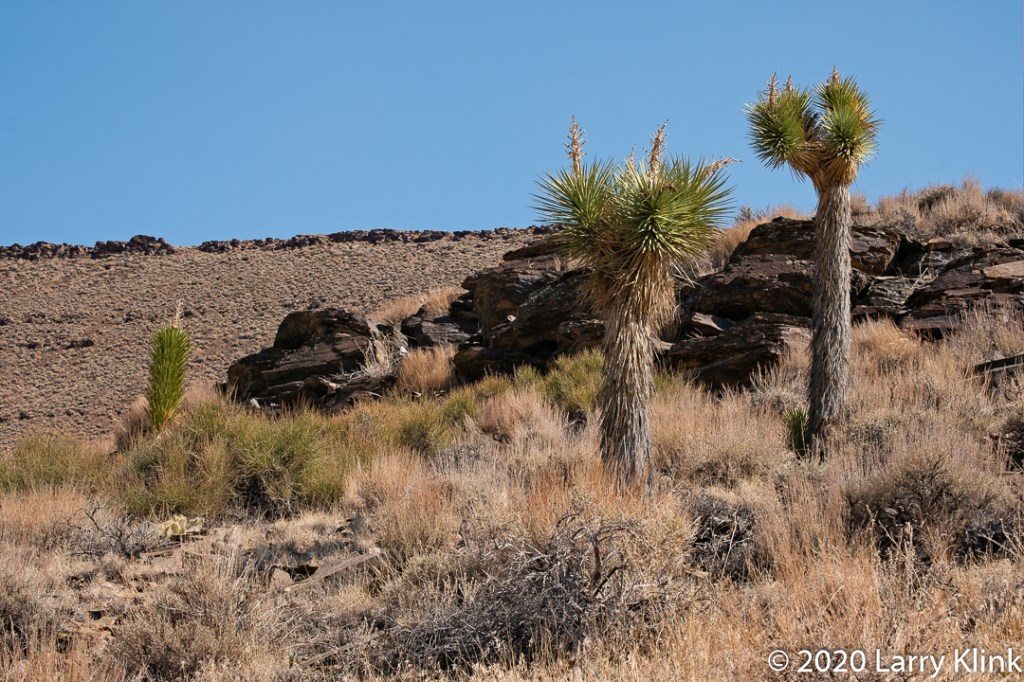
We spent some time exploring Big Pine – Death Valley Road. Along the way, we found some interesting things: A beautiful forest of Joshua Trees, and a wonderful White-tailed Antelope Squirrel. All of this set against the scenery of desert mountains. It was beautiful trip.
Be aware though, if you decide to explore this road, we have read that is one of the most dangerous roads in the country. We found the route to be in good shape but there are some things to consider. We found a lot of tire shredding rocks. There are numerous washes that cross the route so it could be flooded, or the road surface washed out. With photography stops, it took us 7 hours to get from Big Pine to Stovepipe Wells.
This post shares some images from the section between Big Pine, CA and the entrance to Death Valley National Park. I’ll share images from Eureka Valley and Death Valley in a future post.
Please click on caption to see image at higher resolution.
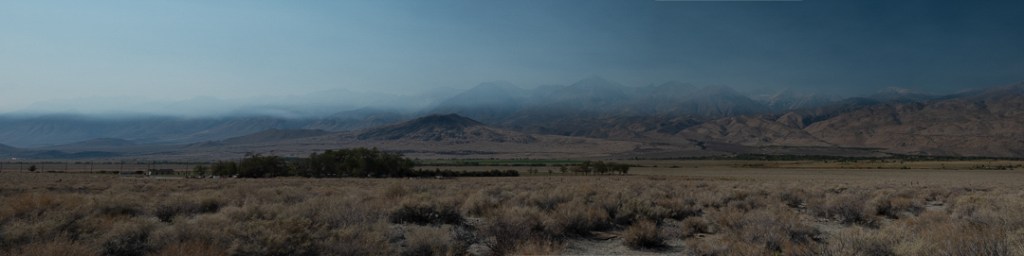
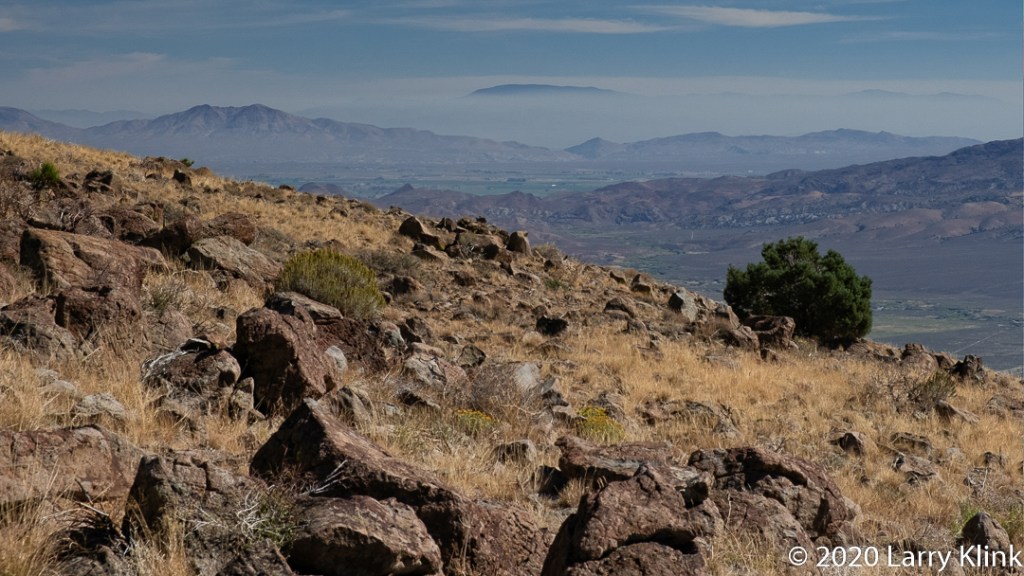
We made a trip to the Eastern California. We had planned the trip about 2 months earlier; before the wildfires. As we waited for the trip, we saw it threatened by the smoky conditions. We even pushed it back a week. As we traveled on Sunday, OCT 11 and even as we visited the Alabama Hills Monday morning, we enjoyed great skies and clear air. But, as we were leaving the Alabama Hills, we could see the smoke beginning to drift over the mountains. By Monday evening smoke from the Creek Fire had filled the mountains and the valleys. Returning to Mammoth Lakes on Monday, we often could not see the Inyo Mountains on our right; they rise tall and steeply just a few miles from the highway. Approaching Mammoth Lakes that evening, the surrounding forests were covered in a thick bank of smoke that looked like a blanket of fog in the late evening light. Tuesday morning the crescent moon and Venus were visible, but both were colored orange. Venus looked like a bright Mars.
We had planned several separate photo shoots, much of which we had to abandon. We salvaged Monday afternoon and Tuesday by travelling south into Death Valley. We left Wednesday cutting a day from our trip.
Please click on caption to see images at higher resolution.
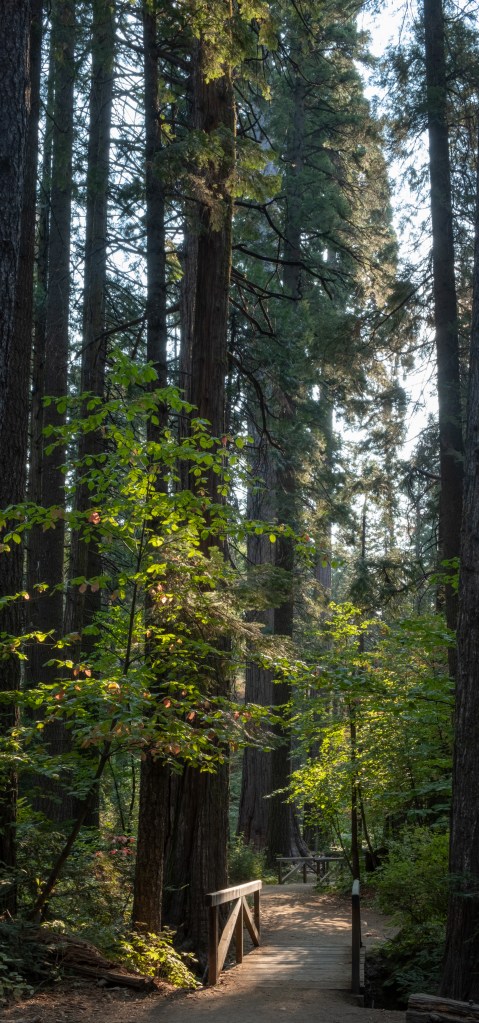
This past week we visited Calaveras Big Trees State Park. It is one of several groves of the Giant Sequoia trees in California. It is a wonderful place to saunter through a forest which includes about 20 of these precious giants as well as large pines and cedars.
Please click on caption to see image at higher resolution.
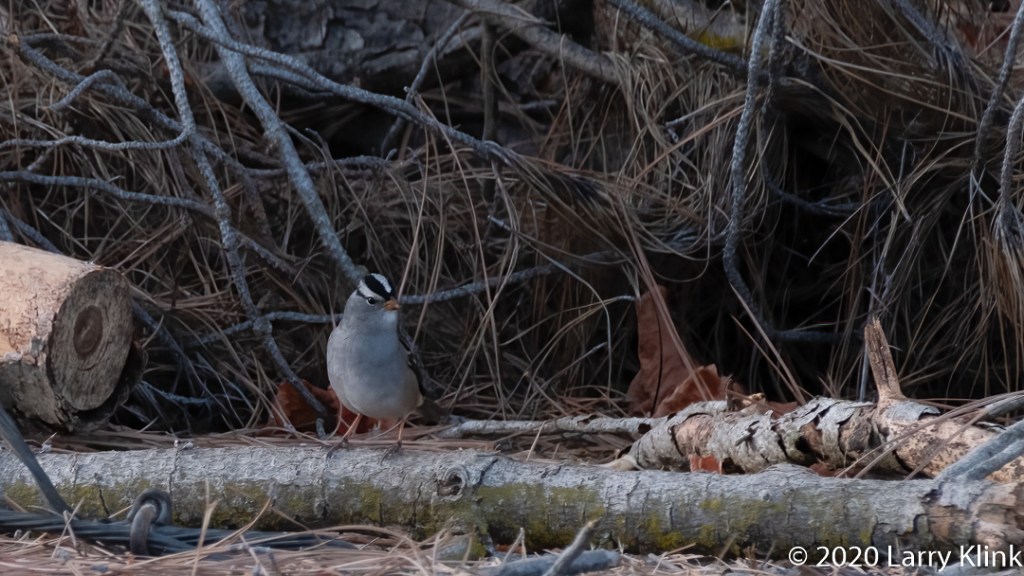
On our day trip to the mountains, we decided to visit and photograph a burn scar; a section of burned forest from a fire a few years ago. The burned trees were intriguing with their swirls of white wood and black charred wood. The grasses had repopulated the area and the Rabbit Brush was blooming. It was a fun time.
Please click on caption to see image at higher resolution.
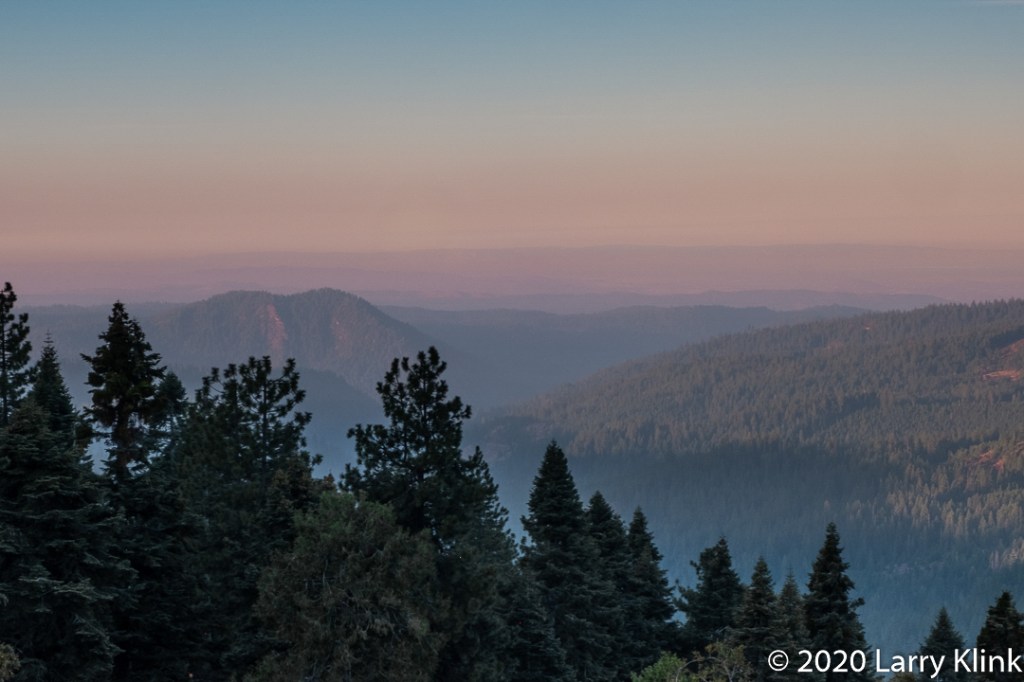
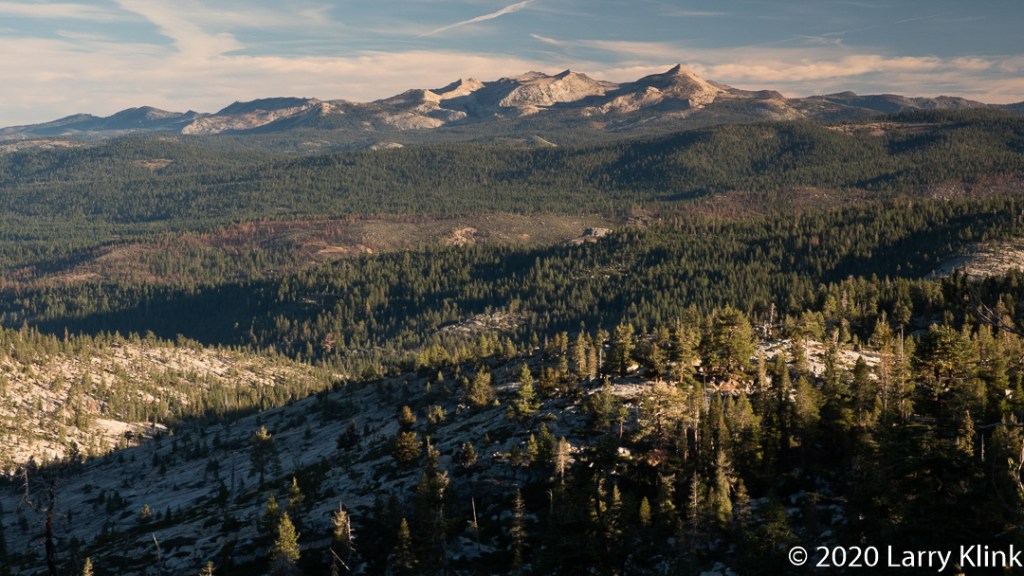
Last week we took a day trip into the mountains. We travelled along RT 88 from Jackson, CA to Rt 89 and followed it over Monitor Pass and down to Topaz then returned. It is a beautiful trip through the Sierra Nevada. While we enjoyed clear skies, at places we could see smoke hanging over distant mountain valleys.
Please click on caption to see images at higher resolution.
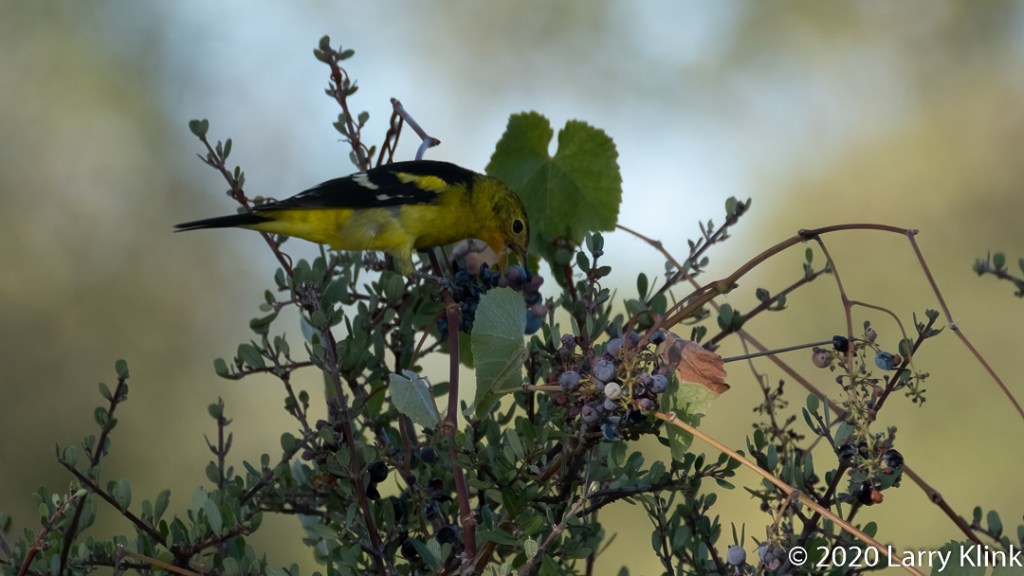
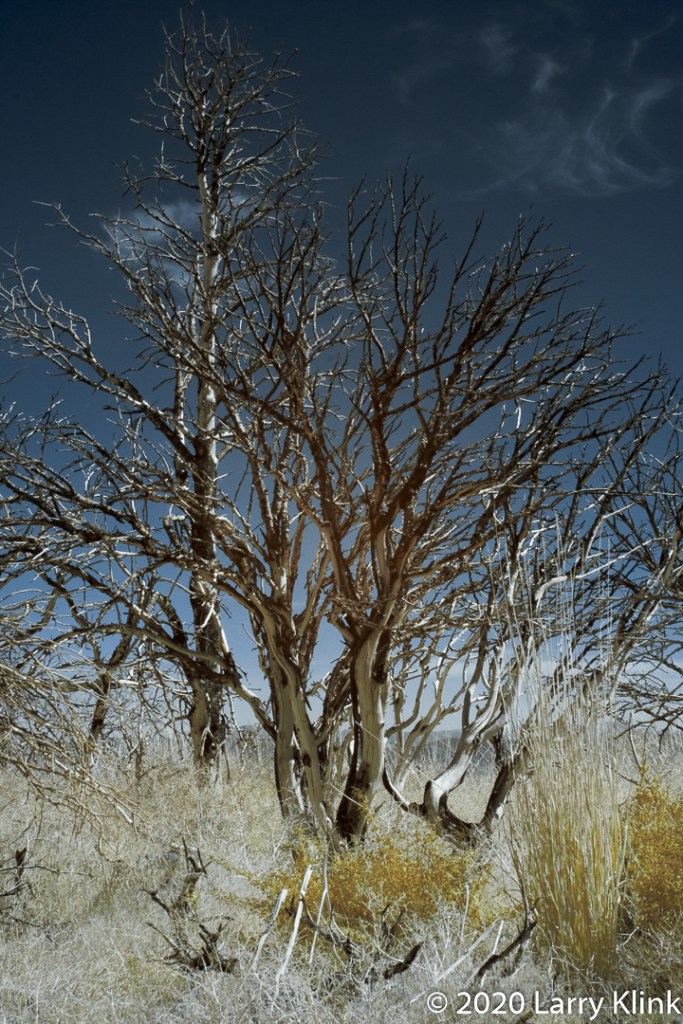
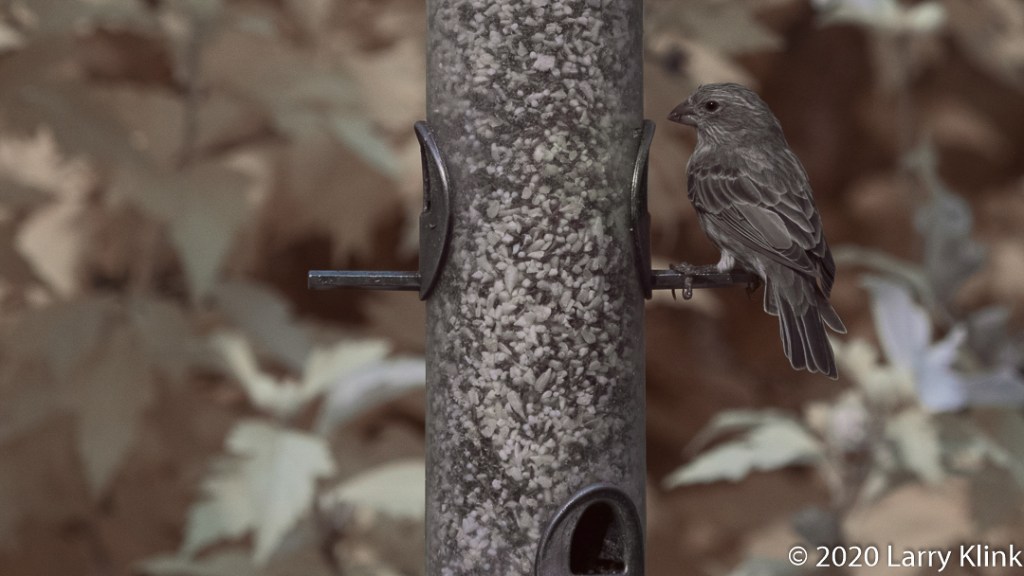
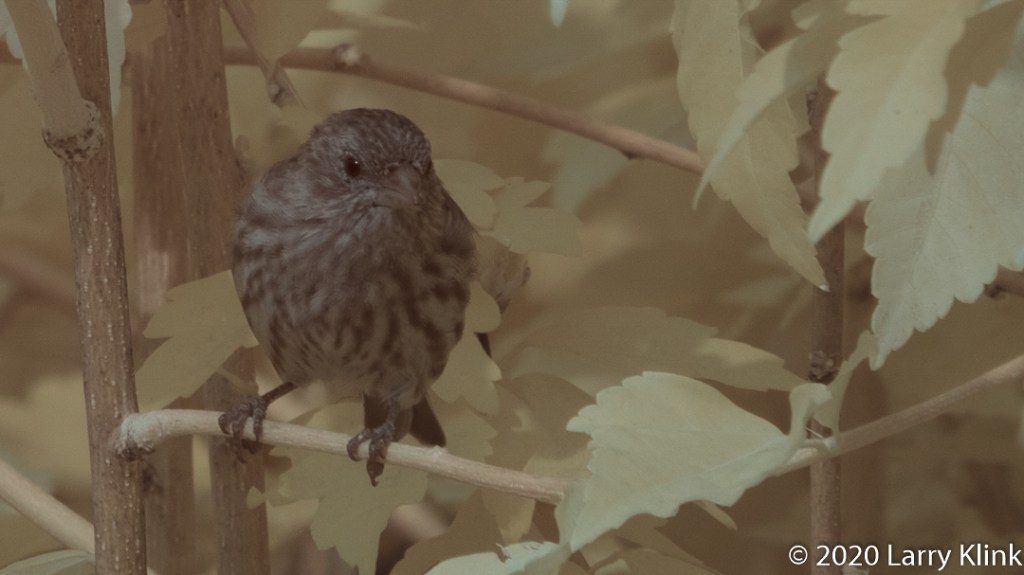
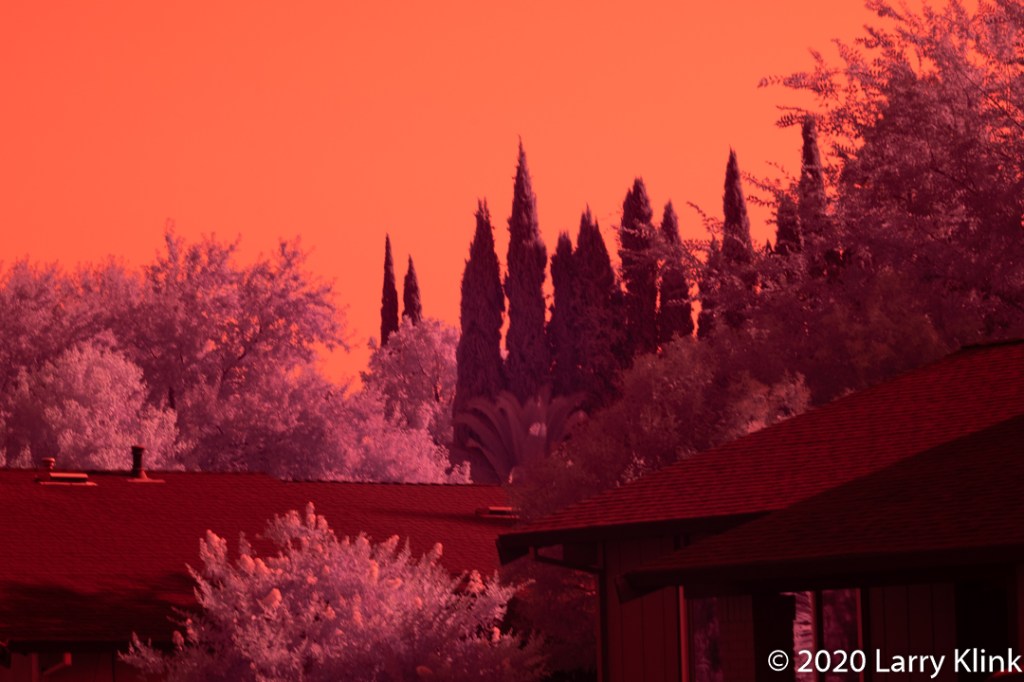
I’ve produced my first set of images in false color infrared. Most infrared pictures I see are in black and white. But my camera can also capture some visible light; not all, just some. So, I can get some interesting effects. I still haven’t fully grasped what it means to shoot heat as well as light. A goldfinch facing the sun will give me some yellow in its breast but facing away from the sun, I lose the yellow. A red car became bright orange. A blue car became darker. So, still much to learn.
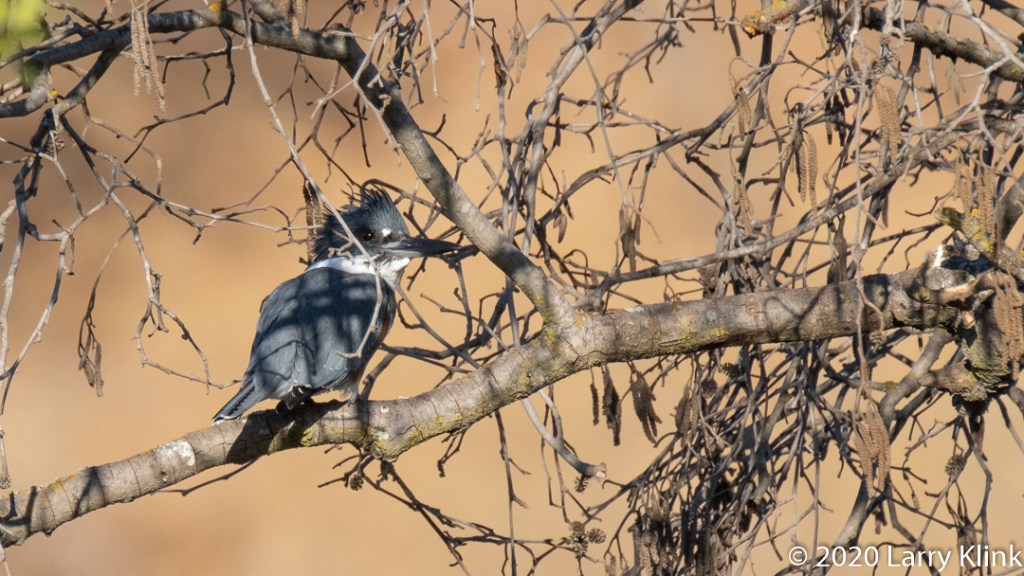
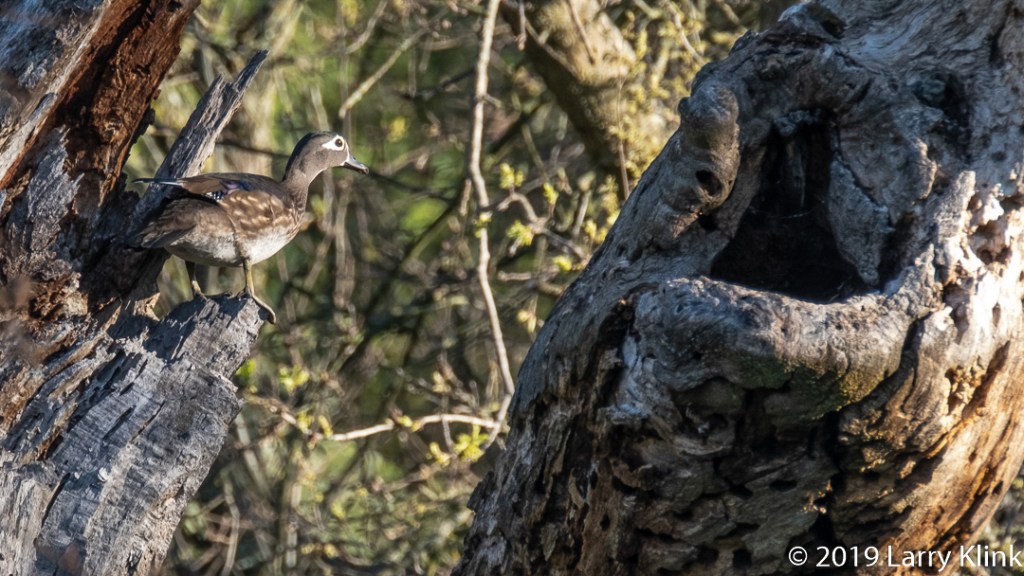
In a blog I follow and enjoy, Peace of Life Today, the author shared the post “Just A Duck” which contained some beautiful photos of a female Mallard. Until a few years ago, that is what they were to me. I could identify a white domestic duck and a male Mallard. I have heard people talk about a variety of ducks, but they were just some abstract concept. Then I met some new friends who were wildlife photographers. They taught me that we live in the Pacific Flyway, a migration route and wintering ground for many species of waterfowl. They, along with other birding friends, taught me about Mergansers, Golden Eye’s, Teals, and many more. The diversity and beauty of these creatures is astounding. For me, there is no such thing as just a duck anymore and I am better for it.
Please click on caption to see image at higher resolution.
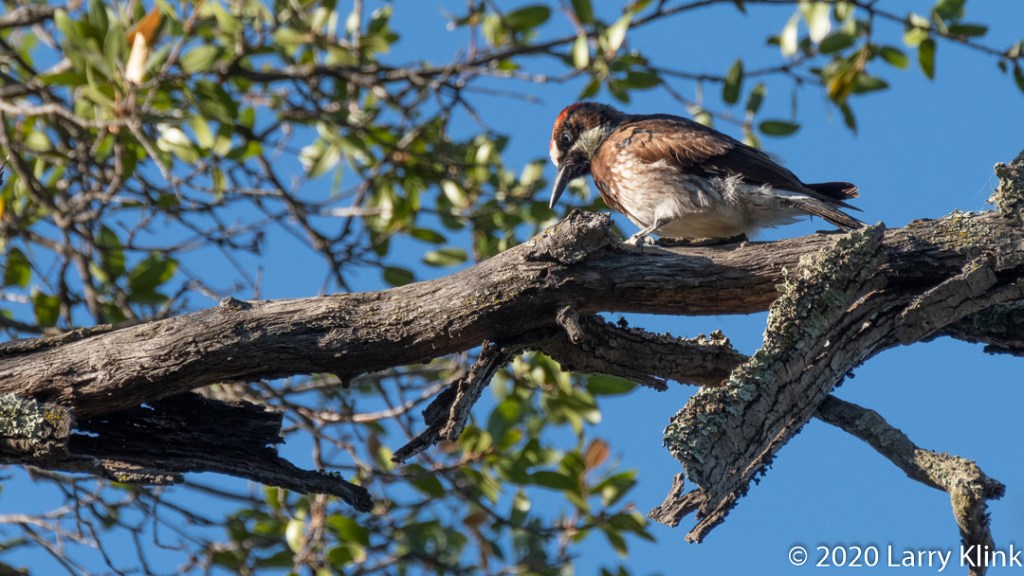
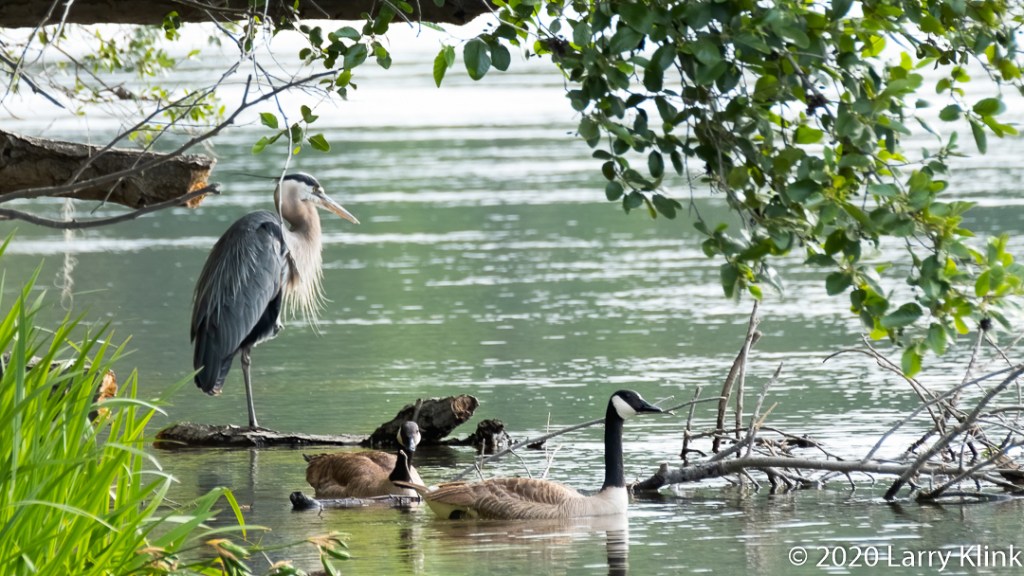
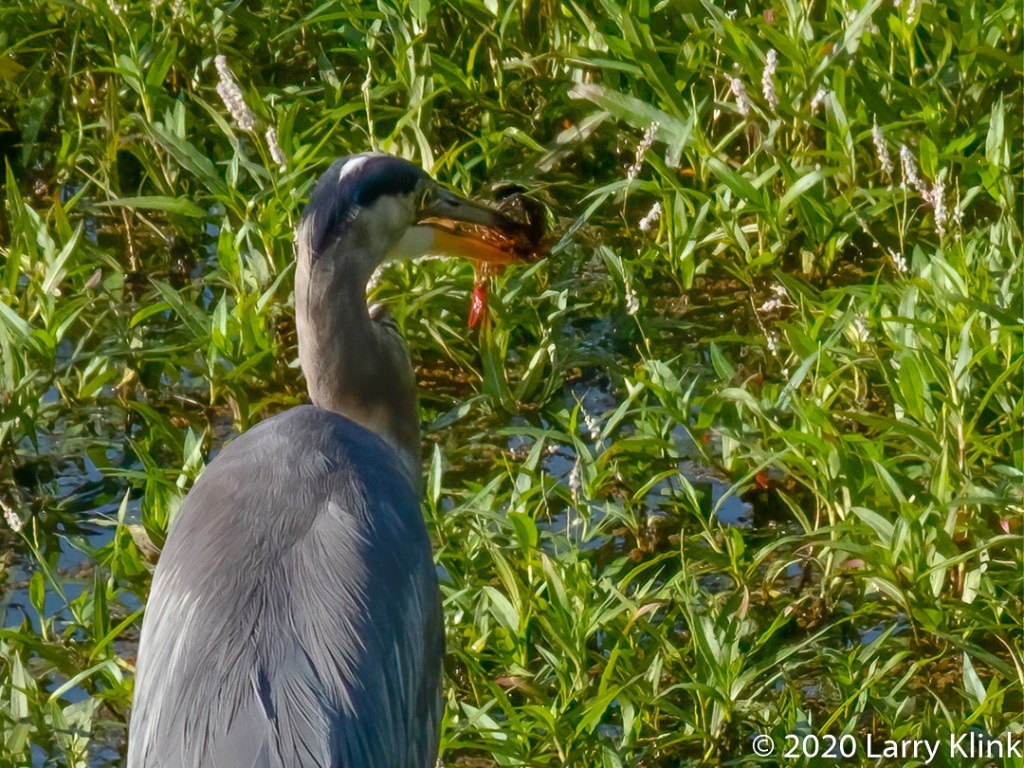
I am sharing some images of Great Blue Herons (Ardea Herodias) that I’ve taken over this summer.
The heron in a tree looks out of place. I normally see them foraging along the water’s edge. But they are comfortable in trees. In fact, they nest high up in trees.
I was able to resolve the issue preventing me from creating Raw files. The Fuji XT series has the menu option “Image Quality” and that is where you tell the camera to produce Raw files. I’ve been shooting with Fuji since 2014 and am well aware of that required step. I checked that menu item 3 times over a period of several days and the menu item wasn’t there. The 4th time I checked it, the option was there. I assume it was the pesky squirrels that raid our bird food.
Selecting the proper white balance can impact the output of post processing significantly. My experience with my Fuji XT-3 follows. The first thing I noticed was that, in my camera, the Temperature and Tint settings on the Raw file were shifted far to the left; so far, in fact, that I had little room to adjust. The JPEG file had those settings pegged at zero. I have seen suggestions to set-up a specific color profile in the camera. In my experiments with a custom white balance color profile, the setting modifies JPEG files properly. However, it does not modify the Raw files even though it appears to when you look at the pictures in playback mode. That seemed a bit strange to me because I sometimes choose the daylight or cloudy day preset when I shoot in the visible light range. Oddly enough, when I chose the Kelvin, “K”, preset and adjusted the temperature manually, the change was reflected in the Raw file. After experimenting with different setting, I decided that I would just keep the white balance on auto.
I also discovered that the best white balance setting is obtained, in Lightroom and Photoshop, by using the Eyedropper Tool and selecting a spot on the image that I know is white. If I don’t have a white spot to select, I choose something close and adjust by dead reckoning.
When using color infrared, there is a step that needs to be added in post processing to get those beautiful false color infrared images. The step is called color swapping. It is important to do the white balance adjustment before you color swap. I did the color swap in Adobe Photoshop. After opening in photoshop, you choose Layer>Adjustment>Color Mixer which opens a box that lets you change the amount of red, green and blue in each of the red, green and blue color channels.
The simplest is a red/blue swap. In the Red Channel, set red to 0 and blue to 100 while in the blue channel, set red to 100 and blue to 0. There are other tutorials that suggest other formulas for color swapping. I have done some experimenting but have found the simple swap to work well. Once you’ve swapped colors, you can make other adjustments to tweak the image to your own liking.
Thanks for sharing my journey, to this point. If you are considering an infrared conversion, I hope you can learn from my early mistakes as I attempted to climb the learning curve. Now, it’s time for me to start getting some interesting images and honing my skill.
Raw Image, Camera White Balance Set to AutoRaw Image with White Balance Adjustment from Crape Myrtle FlowersImage After Simple Red and Blue Color SwapImage After Color Swap that included Swapping Green Channel
Please visit my website, www.earthwatcher.us to see my collection of landscapes and wildlife.