I’ve often marveled at the fact that I get 6K-10K visits to my website each month (www.earthwatcher.us). I’ve also suspected that much of that traffic is from web crawlers. If you aren’t aware of web crawlers, they are programs that constantly search the internet to glean information they can use for various purposes. Sites like Google and Bing use them to populate their search engines with web sites with which they can link keywords to speed their search results. I’ve recently begun using Google Analytics to analyze the traffic to my site. This week was a slow week because I haven’t posted any new images. So, it was a good week to examine the traffic. Interestingly, about 80% of my traffic originated in Russia. Every one of those visits hit my homepage then dropped off; they didn’t look at images. They hit my site daily looking for something. I get more than 100 junk emails every day, many from hot young Russian women looking for love. I suspect these searches are how they found my email address so they can provide me with so many opportunities. I’ll be analyzing my traffic further. Maybe I can find some other interesting tidbits to share.
You are looking for an image of Half Dome at Yosemite. You use a search engine like Google or Bing or even Pinterest. You key “Half Dome image” for your search and up pops a search result with hundreds, if not thousands, of images for you to view. You may not be aware that you just asked your search engine to go through its database to find websites that have the key words Half Dome and image embedded then display them in the search results. Search engines employ web crawlers, sometimes referred to as bots, which continuously move through the internet hitting web site after web site finding and cataloging key words and linking those keywords to the site so that search results are quickly displayed. So, as you can see, having some well-crafted keywords in your website is very important.
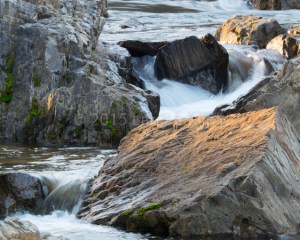
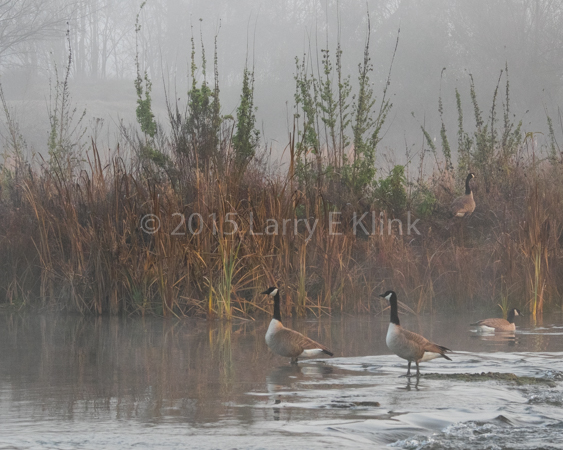
So, how do you craft keywords to be useful? You need to make them specific. This morning, a search on Yosemite yielded 52.6 million results, Half Dome yielded 5.7 million results and half dome images yielded 7.5 million results. When I narrowed my search to Half Dome images sunset, it whittled the list to 270,000 results. If you are posting a sunset image of Half Dome, those words should be used as keywords. If you are posting a watercolor, you need to say that too. If it is location specific, it also helps to tag your image with a location. Another important consideration is phrasing, Here you try to guess what someone might enter as a search request and create keywords that are phrases; something like “Half Dome images”. So you might use this set of keywords: Half Dome, Half Dome images, Half Dome sunset, Half Dome sunset images, sunset images. The list needs to be accurate and meaningful.
Are keywords going to bring you to the top of the search results? No! What industry experts call Search Engine Optimization or SEO, is a mysterious technology that is closely guarded by each search provider. Many people claim to be experts at SEO but what I have read is that no one has really cracked the code. Still, keywords are still important. They are the method that gets you on the search result list. After getting your keywords in order, find some big name celebrity like Jennifer Lopez to recommend your site to her followers so you can trend and get to the top of the results.
Near Auburn, CA, the middle and north forks of the American river join and begin the journey to Folsom lake where they join the south fork. Dams control the flow of the water but it still runs rapidly over the rocks creating picturesque rapids. It was early morning; the sun was just high enough to begin illuminating the steep canyon wall on a cool, foggy morning. The fog was lifting. The muted thunder of the rapids below wafted up canyon. A hole opened in the clouds allowing a shaft of light to spotlight a fog shrouded section of the forest below creating a surreal image of the forest reawakening.
Embraced by the Raging Sea Marin Headlands, San Francisco, CA
I visited the Marin Headlands, the stretch of the California coast just outside the San Francisco Bay; just beyond the Golden Gate Bridge with Rick Bieniek, a fellow photographer. It was mid-afternoon, the sun was bright in the sky, it was unusually warm and a breeze was flowing in from the ocean. Hiking down the trail to the beach, the ocean thundered but the sea looked rather tranquil. Upon reaching the beach, the reason for the thunder became apparent. Waves were breaking rhythmically. But every 5 minutes or so, a series of waves would arrive that were breaking 8 – 12 feet high. The shore line dropped off steeply, so the broken waves receded rapidly, crashing into the oncoming giants that followed them. The sea roiled, creating thick, white foam. The position of the sun caused the sea to reflect in silver tones and to backlight the rising breakers. It felt beckoned; I felt embraced by the raging sea.
The Canada Goose is a year round resident of Sacramento, and seemingly everywhere else. The Common Goldeneye is only a winter resident; a snowbird if you will. They, the ever present mallard, gulls, mergansers, herons, coots and egrets grace the landscape of William Pond Park, on the American River Parkway, in Sacramento County.
Canada Geese at Attention
I have a favorite ‘go-to” spot at the park – a spot where the American River widens and is dotted with small islands. The cool winter temperatures cause fog. The winter sun rises, providing a golden hue to the fog shrouded grasses and trees. I love being there before sunrise to watch the light unfold. Though the geological forces shaping the river valley progress too slowly for me to comprehend, weather conditions, light and the actions of the critters make every visit different.
I trust these images will convey a sense of what I get to experience while I am there. Please click on the pictures to get a larger view of the image.
Sierra Foothills—Sunset over the Foothills, Perspective 1 Click to see larger image.Sierra Foothills—Moonrise over the Foothills, Perspective 2 Click to see larger image.
Sunday January 4, was a special night. It was the night when the moon rose in its northernmost position. Additionally, sunset and moonrise occurred a few minutes apart. So, the sun gave an orange glow to the moon.
A few months ago, I decided I was going to do a series of images to show the foothills of the Sierra Nevada. I would do several images, at different times of day, and different times of the year, to show how the foothills change while retaining their beauty over the course of the year. The oaks and tall grass provide the quintessential look I associate with the foothills – a look that is ingrained in my mind from the westerns I watched as a kid. I can almost see Gene Autrey, Roy Rogers or the Cisco Kid riding down the range.
I visited one of my spots with the intent to shoot the moonrise. I’ve been there for several moonrises but the position of the moon, as it rose, left me wanting a better shot. This evening, the moon was in the position I wanted, it had a beautiful orange glow and, as an added bonus, high thin cirrus clouds to provide a colorful corona. A special night indeed!
As the moon rose, the sunset over my shoulder lit the sky a brilliant orange which cast the trees in silhouette. A lone, old, oak on a hillside stood in grandeur against the orange sky.
I hope you enjoy these images. Please read my blog: How I Shot This Moonrise for tips on how to make similar images.
Sierra Foothills—Moonrise over the Foothills, Perspective 2 Click to see larger image.Original Raw Image of Foreground. Note that moon looks like a bright white blob.Original Raw Image of Moon. Note that foreground is too dark to see.
A moonrise can be very difficult to shoot, especially if you want the mood to reflect the transition from twilight to darkness but still want the moon to look realistic. The range of light the camera sees is much more limited than what our eyes can see. So, left to its own devices the camera will give you a nice moon and a foreground too dark to see or a foreground that you can see and a bright white blob where the moon should be. I like to see the foreground and see the man in the moon. I like to have the moon the right color too.
This shot was taken on January 4, 2015, at the rise of a nearly full moon. Sunrise and sunset were nearly at the same time. And that is a key point. The dynamic range, i.e. the difference in the brightness of the moon and the brightness of the background, is smallest when the moon is full and is rising just as the sun sets. You often get the nice gold or red color in the moon at that time also. On this night, I also was lucky to have high, thin cirrus clouds to give me a nice corona around the moon.
The second point to realize is that it is nearly impossible to a moon rise like this with a single shot and not get a lot of noise when you boost the shadows or exposure in post processing. So, I rely on multiple shots and HDR. There has been a lot of backlash against HDR because it is often overdone. HDR’s problem is the carpenter, not the hammer. The next point is to realize that the moon moves. Well, the earth rotates but it makes the moon appear to move. In his book Night Photography, Lance Keimig says it moves its apparent diameter every 2 minutes. So, if you make your exposure too long, you get a streak instead of a moon.
So, what did I do?
Step 1 is planning. I use The Photographer’s Ephemeris, a web and mobile app, to get the date and time of moon phases, times for sunrise, moonrise, etc. for any spot on earth. It even provides the direction from which the sun or moon will rise and set at the spot where I plan to shoot. I’ve also been to my spot on numerous occasions so I can visualize where moon rise will be and plan my composition.
Step 2 is setting up the composition. Since I’ve been to my spot, I have a composition in mind before I go. When I get to my spot, I find my composition. Having used the Photographer’s Ephemeris, I have a good idea where the moon will rise and that, of course, is a key point of the composition. Once I have decided upon my composition, I insure that focus and depth of field are correct. I typically set and lock my focus to the prominent foreground subject and use a strong depth of field – F16 or so. Others have said that you should focus on infinity or on the moon but, since the foreground is very important, I usually focus there. I find a little loss of sharpness in the moon isn’t as objectionable as softness in the foreground. By the way, you need to be sure your camera is locked on a tripod and it is preferable to use a cable release.
Step 3 is exposing the shot. The correct exposure will, of course depend upon a number of factors – darkness, weather conditions, haze, etc. But, you can expect to use a timed exposure. So you need to consider several factors: noise, apparent movement of the moon and getting 2 good shots – a reasonably well exposed foreground and another of a well exposed moon. There is no magic formula for this. I usually take test exposures to judge how quickly the light falls off and to gauge how far I need to adjust the exposure when moving between the foreground and moon shots. On my old DSLR, that involved taking the shot and looking at the shot and its histogram. The Fuji XT-1 lets me see the exposure and histogram in real time so it’s a lot easier and faster. For this scene, I exposed the foreground for 5 seconds at ISO 800. Immediately upon completing the image, I changed the exposure to 1/8 of a second to get a well exposed moon. It’s important to move quickly because the moon is moving and you want them in as close to the same spot in the image as possible for post processing.
Step 4 is post processing. I use Adobe Lightroom for my post processor and I use Photomatrix Pro for my HDR work. HDR usually takes three images to get an acceptable result. But, I only have 2. So, I create a virtual copy of the foreground and adjust its exposure to fall in about 2 stops brighter than the original foreground image. (Note: I will often take a shot of the foreground before the sun sets to use as my third image. But in this case, the range of exposures was too great and the composite just didn’t look right.) I select the original foreground image, the exposure adjusted copy and the original image of the moon and export them to Photomatrix for creating the HDR image. Photomatrix provides numerous preset options; I chose the one that most closely approximates my vision and then tweak it to get my desired result then import it back into Lightroom.
California’s central valley is a major winter layover spot on the Pacific Flyway; one of the prime routes for migratory birds. Geese, waterfowl and shorebirds alike make their winter home in the flooded rice patties and grain fields which farmers allow to go fallow for the winter. Some years back, farmers considered these birds a pest and set about destroying them. In one of the grand success stories, farmers, conservationists, and the state and federal government set aside several plots as wildlife refuges for the birds. Farmers can use noise canons and other non-destructive means to chase the birds from their property while the refuges provide the birds a safe place to stay. Bird watchers, duck hunters, photographers and others have benefited.
I visited the Sacramento National Wildlife Refuge earlier this week. The day was overcast. I knew birds would be present. I wasn’t hopeful that it would be a great day to photograph them. But, on this day, nature provided ephemeral shafts of sunlight through breaks in the otherwise impenetrable layer of dark gray, stratus, clouds. The shafts highlighted the sky and the ponds, while casting the trees and birds in silhouette. It created a mood that captured the essence of a winter afternoon: the sun providing reassurance to the birds and trees resting and waiting for life to start anew. It was a great day after all.
You are at your child’s soccer game. You dutifully take your seat in the stands and, as action progresses, you get some great shots of the back of your child’s head or standing after the action is over. You are driving and see a neat scene, you stop, hop out of the car or roll down the window, take the shot and, it just doesn’t do justice to what you saw. You are disappointed, but, Oh Well, you aren’t a professional, you are using your smart phone camera so you can’t expect much and that is just how it is.
You’d be surprised how one little tip can make a big difference: move around and find the right vantage point.
At an athletic event, don’t set in the stands. Stand and move along the sidelines, facing the action and take pictures of the faces and bodies as you see the action unfold. Be careful not to get onto the field or in the way of the ref. Also, if you are shooting into the sun, faces will be dark so change your angle to minimize the backlighting.
Photographers will tell you to “shoot the light”. The angle of the light can make a world of difference. It impacts the color of the scene and how shadows and light interplay to make the scene interesting. Often, just walking a few feet in one direction or another will make a scene more interesting. Just be careful, don’t walk off a cliff, into traffic or fall into the water.
Try this simple tip. Let me know how it works for you.